
A crypto wallet is required to store digital assets, receive transfers, and send cryptocurrency on the blockchain without intermediaries. In 2026, users can get a crypto wallet in several ways, including modern solutions integrated directly into messaging apps like Telegram. However, there are important nuances related to security, control over keys, and usability.
In this guide, we explain how to create a crypto wallet, what types of wallets exist, how they differ, and what beginners should pay attention to in order not to lose access to their funds.
What Is a Crypto Wallet and Why You Need One
A crypto wallet does not store coins themselves. It stores cryptographic keys that give access to assets recorded on the blockchain. Each wallet address has:
- a public address, which you share to receive funds
- a private key, which signs transactions and proves ownership
Private keys can either be stored on the user’s device or held by a service. This distinction directly affects security and control.
A crypto wallet allows you to:
- receive cryptocurrency
- send assets and sign transactions
- track transaction history and fees
- access exchanges, payments, and Web3 services
In practice, the question of how to set up a wallet for crypto always comes down to one core decision: who controls the private keys.
How to Choose a Crypto Wallet: Key Criteria
When deciding how to get a crypto wallet, there are two primary criteria to consider.
Accessibility. Wallets integrated into familiar environments significantly reduce friction. If a wallet works inside Telegram, users do not need VPNs, separate apps, or complex workarounds. A familiar interface matters, especially when you set up a crypto wallet for the first time.
Security. The most important question is where private keys are stored. In non-custodial wallets, keys and the recovery phrase are generated locally on your device and never transferred to third parties. Combined with Telegram 2FA, a PIN code, and phone-level biometrics, this creates several layers of protection.
The fewer external rules and restrictions you depend on, the safer long-term storage becomes.
Types of Crypto Wallets: Custodial vs Non-Custodial
All crypto wallets fall into two main categories.
Custodial wallets
Custodial wallets operate on an account-based model. Private keys are stored by the service itself, such as an exchange or payment platform. Users can send and receive cryptocurrency, but all operations are governed by the platform’s internal rules.
This model is convenient: there is customer support, account recovery, and no need to store a recovery phrase. However, there is a systemic risk. The service may impose limits, require KYC, or freeze funds due to regulatory reasons.
Non-custodial wallets
Non-custodial wallets work differently. Private keys and the seed phrase are created on the user’s device and never leave it. Transactions are signed locally, without a third party.
In simple terms, you fully control your assets. No service can block or restrict your funds. The downside is responsibility: if the seed phrase is lost, access cannot be restored.
This is why many users choose this option when learning how to set up a private crypto wallet.
Crypto Wallets in Telegram
By 2026, Telegram has become a popular entry point into crypto. Users increasingly rely on messenger-based wallets due to convenience, fast onboarding, and access to a growing Web3 ecosystem.
Through bots and mini-apps, users can store cryptocurrency, send transfers, receive transaction notifications, and interact with DeFi services – all without leaving Telegram. This approach significantly lowers the barrier for those who want to understand how to set up a crypto wallet for beginners.
Step-by-Step: How to Create a Crypto Wallet in Telegram
If you want to understand how to create a crypto wallet using Telegram, you can use the Crypto Office mini-app.
Follow these steps:
Open Telegram and launch @officeapp.
- In the main menu, open the “Wallet” section and select “Create wallet.” The system will automatically generate blockchain addresses.
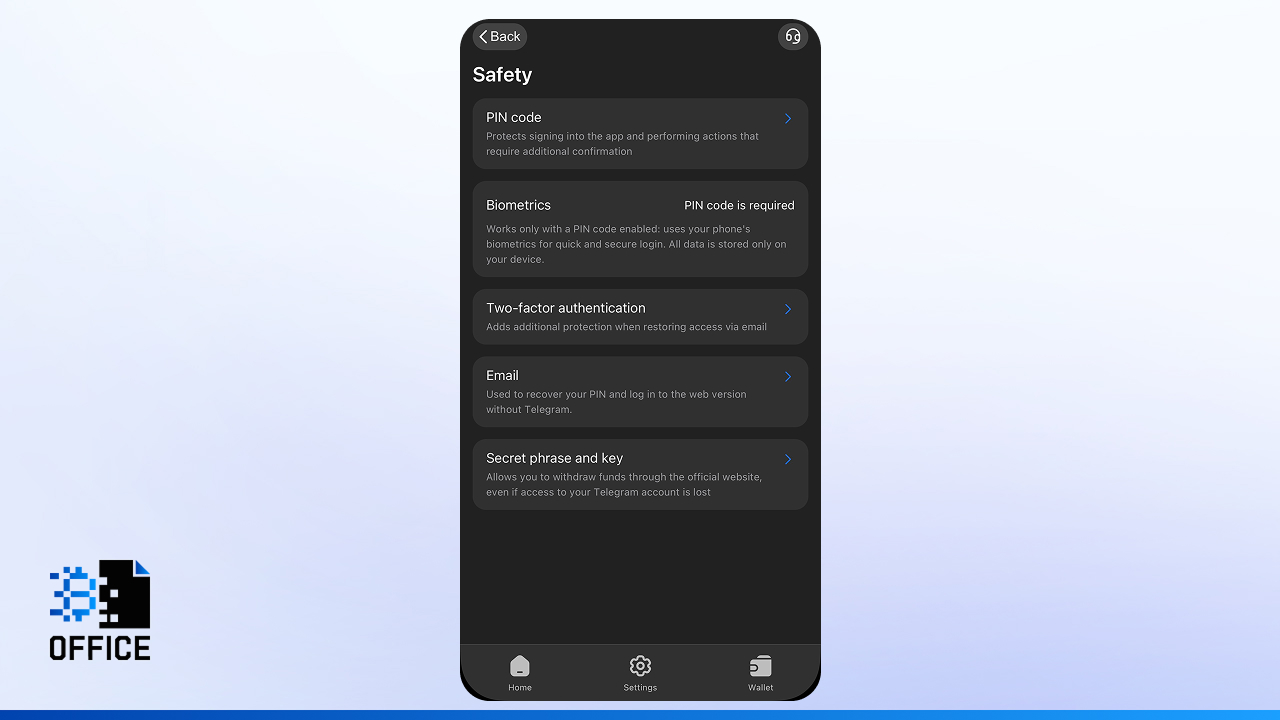
- Set up access protection: create a PIN code, enable biometric login if available, and activate two-factor authentication.
- Save the recovery data displayed by the app. Write it down offline. Do not store it in cloud services or Telegram notes.
- Check that wallet addresses for supported networks appear in the Wallet section. This confirms that the wallet is ready to use.
At this stage, the process of how to set up a crypto wallet for the first time is complete and usually takes only a few minutes.

What to Consider When Creating a USDT Wallet
USDT is not a single token on one blockchain. It exists as separate smart contracts across different networks. USDT on TRON, Ethereum, or BNB Chain are technically different assets and do not interact directly.
When you set up a wallet for crypto that will be used for USDT, pay attention to the following points:
- Network selection. A wallet address is always tied to a specific blockchain. USDT TRC-20 works only on TRON, USDT ERC-20 works only on Ethereum, USDT BEP-20 works only on BNB Chain.
- Fees. Transaction costs depend on the blockchain, not on USDT itself. TRON fees are paid in TRX and are usually low. Ethereum fees are paid in ETH and can reach tens of dollars during congestion. BNB Chain fees are paid in BNB and usually cost only a few cents
- Cost of mistakes. Most USDT losses happen not because of hacks, but due to sending funds via the wrong network. Such transactions are confirmed on-chain but cannot be reversed.
When learning how to create a crypto wallet, it is critical to choose an interface that clearly warns about network mismatches before sending funds.
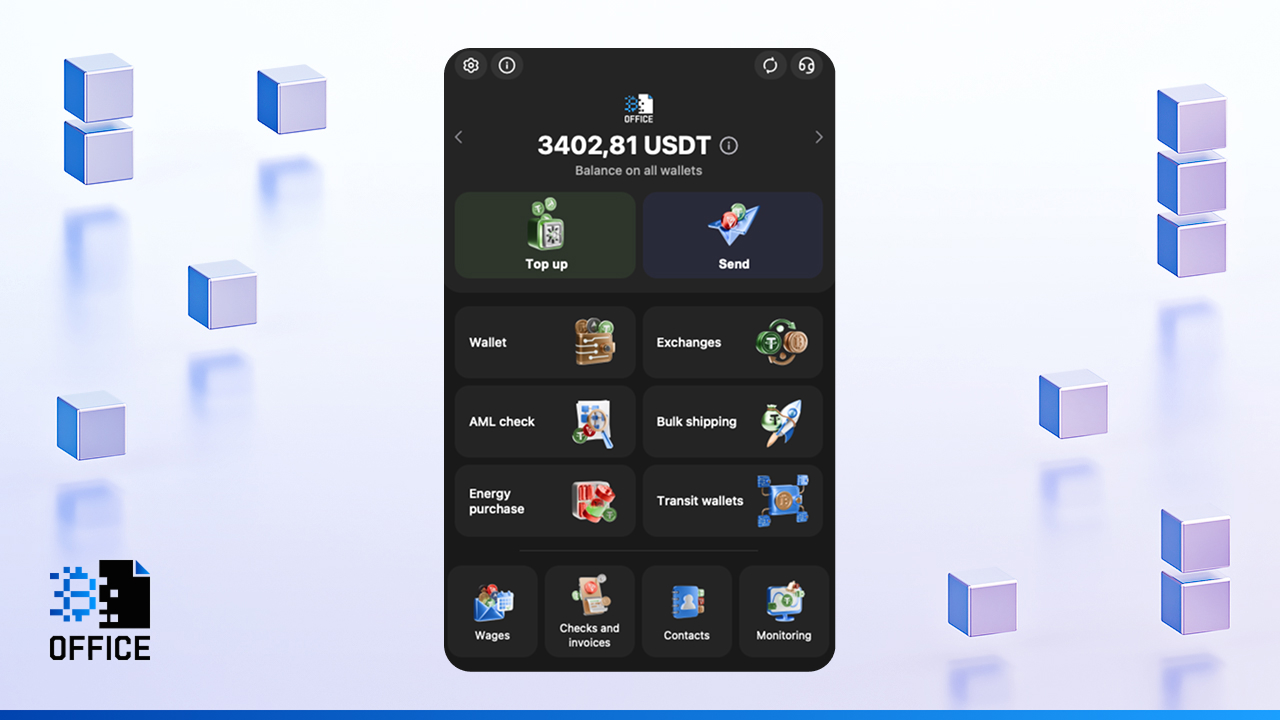
How to Use a Crypto Wallet After Setup
After you set up a crypto wallet, all core actions are available in the Wallet section. Here you can see balances, supported networks, and transaction history.
The basic workflow is always the same:
- Select the network
- Verify the address
- Check the fee before confirming
Before sending funds, always confirm:
- the correct network is selected
- the address is copied in full, without changes
- there is enough native blockchain currency to pay the fee
These simple checks prevent most irreversible errors.
How to Fund and Withdraw From a Crypto Wallet
To add funds in Crypto Office:
- Open the “Wallet” section and select the asset
Click “Deposit” to view the wallet address
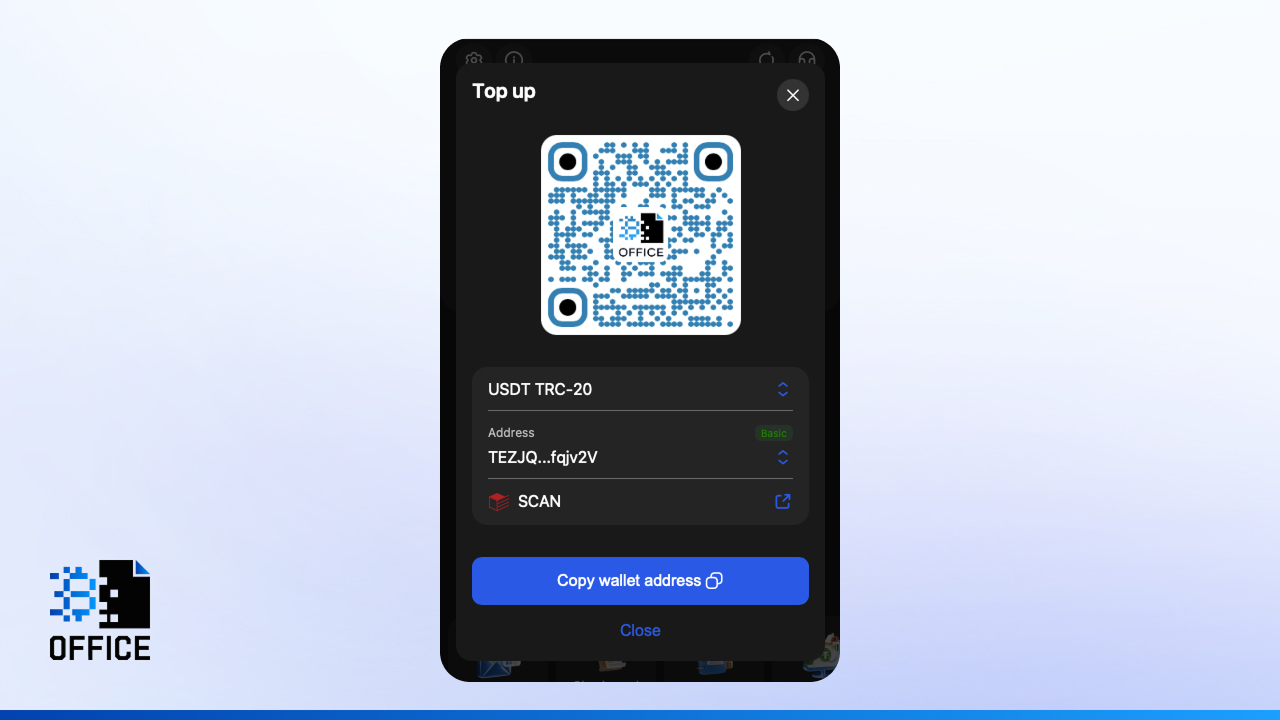
- Copy the address
- Send it to the payer or use it for transfers
After the required blockchain confirmations, funds appear on the balance automatically.
To send cryptocurrency:
- Select the asset in the wallet
- Click “Send”
- Enter the recipient’s address in the correct network
Specify the amount
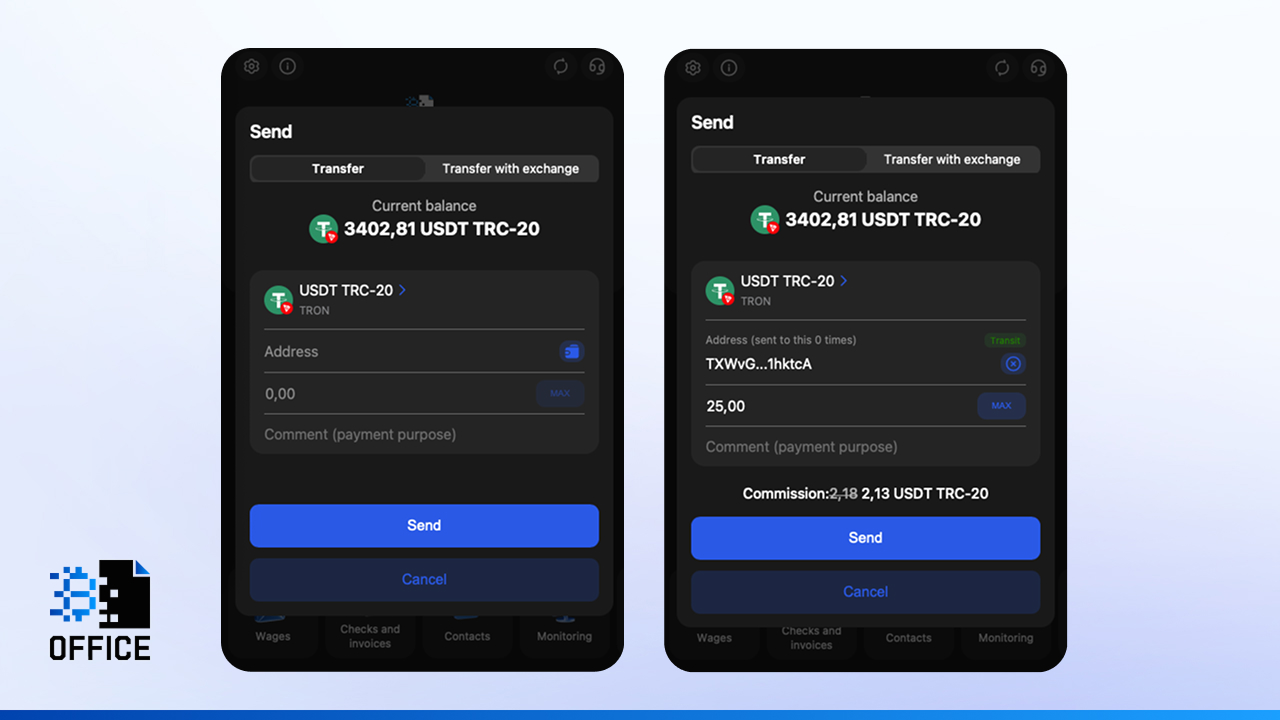
- Confirm the transaction
In addition to standard transfers, Crypto Office supports token transfers with automatic network exchange. Before confirmation, always double-check the address and final fee.
Transfers, Exchange, and Other Wallet Functions
Inside the mini-app, users can perform everyday operations without external services:
- Transfers. Send cryptocurrency by address or from an address book. Network and fee details are visible before confirmation, and all transactions are stored in history.
- Exchange. Built-in exchange allows you to preview rates and final amounts in advance. Addresses are checked before execution.
- Bulk payouts. Send funds to multiple addresses at once.
- Transaction tracking. Full history, balances, and turnover are available directly in the app.
- Additional tools. Payment requests, invoices, and transit wallets help manage incoming and outgoing funds efficiently.
Buying Cryptocurrency and Funding Your Wallet
In 2026, P2P platforms remain the most common way to buy cryptocurrency. Users transfer fiat to sellers and receive crypto directly to their wallet address.
When choosing this method while learning how to get a crypto wallet, always check seller ratings and deal conditions to minimize risks.
Funding from an exchange
If your assets are already on an exchange, the process is simple:
- Open the withdrawal section on the exchange
- Copy your wallet address from Crypto Office
- Select the same network as shown next to the address
- Check the fee and confirm
After confirmations, the transfer appears in your transaction history with amount, time, and fee details.
Transfers from another wallet
This is a standard blockchain transfer. Copy your address, paste it into the sender’s wallet, and wait for confirmations. Many users consolidate funds this way to avoid managing balances across multiple apps.
Common Mistakes When Creating a Crypto Wallet
The most frequent issues include:
- storing the seed phrase as screenshots or in cloud storage
- selecting the wrong blockchain or token standard
- forgetting to keep enough native currency for transaction fees
When understanding how to set up a crypto wallet for beginners, these mistakes are more common than technical errors. A habit of checking networks and fees before every transaction solves most problems.
Crypto Wallet Security After Setup
After you set up a private crypto wallet, follow these basic rules:
- store the seed phrase offline only
- enable two-factor authentication
- use strong PIN codes and biometrics
- protect your mobile device with a password
avoid suspicious links and unknown apps
If you use a wallet in Telegram, remember that account access matters. Losing access to Telegram does not automatically mean losing funds, but recovery becomes more complex. Always plan Telegram account recovery in advance.
Conclusion
In 2026, creating a crypto wallet takes minutes, while losing access can take seconds. The right wallet choice determines everything. Non-custodial wallets provide independence, Telegram integration removes entry barriers, and built-in network checks reduce costly mistakes.
Understanding how long does it take to set up a crypto wallet? helps set expectations: usually just a few minutes, but responsibility lasts much longer. A disciplined approach to wallet security ensures safe and predictable use of digital assets.
Michael Turner knows his stuff when it comes to crypto and blockchain. He puts out content that's not only well-researched but also easy to understand, helping people get a handle on managing their digital assets.